E-textiles Day 1 - Volts, Watts and Waterfalls
Electricity basics
In this section, we will understand the basics of electricity and how it can help us represent information. We will start with the simplest of the circuits, and infer from it how the information can be stored, managed and sent over to other components.

Charge
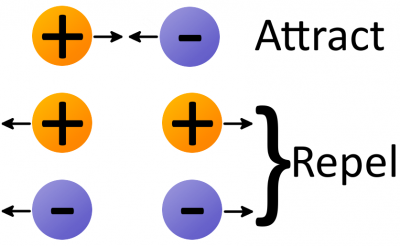
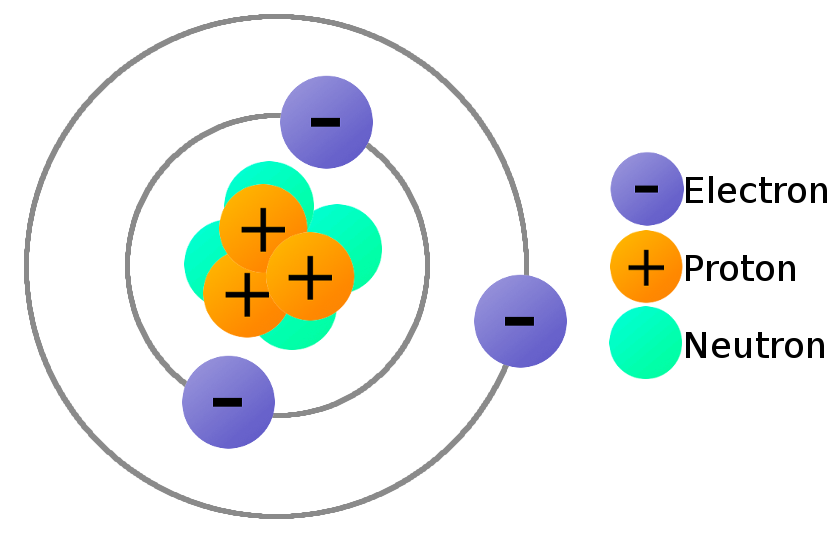
It’s all about electric charge. Objects can hold an electric charge (either positive or negative), or not (meaning they are neutral). In subatomic particles, protons hold positive charge, electrons hold negative charge and neutrons are neutral. We find these particles in atoms and they define the world as we see it, being the underlying structure of what we understand as elements (Hydrogen, Helium, Uranium…). We all know that particles charge go like:
In an atom, the core holds protons and neutrons together, while electrons are orbitting around them:
Voltage
When we force electrons to group in a certain area, leaving another area without electrons, we create a difference in voltage.
When two objects have a difference in voltage, we can say that their electrons will try to jump from one another creating a current flow, to balance out the situation and become stable. Voltage is expressed in Volts (V). This voltage can be constant with time, or alternating:
The units
Energy is measured in Jules (J), voltage in Volts (V) and Charge in Coulombs (C). Note that all the units that come from the discoverer’s name are capitalised!
Current
When two objects are subject to a difference voltage, electrons will try to come back to their position. When doing so, we say there is an electric current or just current. This movement of electrons inside a material is measured in Amperes (A) or just Amps. If we have alternating voltage, we will have also alternating current (AC), and the same with constant voltage, in which case we will have DC.
Ohm’s law
For electrons to go from one point to another, when subject to voltage, they will have it more or less difficult to go through. How difficult it is, is called resistance, and it’s measured in Ohms (Ω).

By Wikipedia
Georg Ohm discovered that voltage (V), resistance (R) and current (I) go with the following formula:
Meaning that when the resistance is two high, there is almost no current (and when the current is 0, it means we have an open circuit). When the resistance is almost 0, the current can be very big, leading to what we call a short.

The nice thing about it, is that we can control this flow (or lack of it), and then we can make very cool things!
Note
“Conventional current” ALWAYS goes from positive to negative. It’s an abstraction that summarizes the movement of both negative and positive charges.
Some reference tutorials
Hands on!
Let’s make this first easy circuit and explore:

Let’s measure, in the previous circuit:
- Voltages in ± lines with a multimeter (change USB - Battery) and resistor size
- How bright the LED is
Now let’s integrate a push button in our circuit so we can control the led manually.
References
- Resistor calculator calculate your resistor values.
How to select a resistor for an LED
-
Find out the LED’s forward voltage (depends on the color) and maximum current (typically 20mA).
-
Calculate how much voltage drop you need across the resistor at that current.
-
Apply Ohm’s law to find out the resistance needed. Round up to the closest available value you have.
-
LED tutorial: you can find here, among many other things, typical forward voltages.
Our new best friends
The multimeter
A device that combines several measurement functions in one single unit. At a minimum it can measure Voltage, Resistance and Current. It also serves as a debugging tool to check for continuity between points in the circuit.

References
Here are some resources for better understanding the multimeter and learning how to use it:
- Sparkfun tutorial
- How to use a multimeter: this page also contains a summary of the symbols and different forms in which they are represented in diferent multimeters
- Fluke’s How to Use a Multimeter: A Comprehensive Guide
Rotary selector:

Measuring continuity
This is the easiest. You don’t even need a full circuit for this.

Measuring DC voltage
If you select too high a range, you lose some precision. Go one step lower.
If you select too low a range, you’ll get an overload message (or a ‘1’). That’s fine.

Measuring resistance
Select the appropriate Ω range and measure the resistor in isolation.
Measuring current
This is a little special: Your multimeter must be in series with the circuit.
The breadboard
It is a prototyping tool we use to connect electronic components with ease, so we can make circuits fast and prototype easily:

References
- Another sparkfun tutorial, now about breadboards.
Arduino programming
Installation
You will need to install the Arduino IDE v.2.3.3. After that, we need to define the board that we are going to use.
Guide
To get started with the Arduino IDE, and install the boards needed for the Adafruit Flora board, please:
Open your Arduino. Go to: Settings > Additional Board Manager URLs

There, add the boards sources. One line per URL:

Paste this in the field there:
Then open the Boards Manager in the left sidebar:

Search for “Adafruit AVR Boards” and install them:

Close the menu and in Arduino again select Tools/ Board and select the Adafruit Flora as your board:

Reference
Flora board
The Flora is a great microcontroller board for wearable projects. It has a built-in LiPo battery charger, an on/off switch, and many other features to make your life easier.
Pinout
The input/output pins I/O pins of our board are the gates that we use to interact with the real world. To know with who are we dealing we need to know the pinout of our board.

Note
- Lisa’s Soft Switches Collection of soft-switches by Lisa Stark
- Lisa’s Soft Sensors Collection of soft-sensors by Lisa Stark